Sunday, October 24, 2010

Elevation/Rotation

Back again,

This is the system I have come up with to rotate and elevate the gun. Once I have received the motors from www.robotmarketplace.com I will post a video of it doing its thing.

It's a fairly simple setup really, a motor for each axis rotating a shaft via chain... The whole system can be removed from the tank with 1 split pin for easy maintenance. As a stand alone system it can provide 45 degrees of depression, 45 degrees of elevation and 360 degrees of rotation. Mounted in the tank that movement is limited to 30 degrees of rotation 5 degrees depression and 15 degrees elevation.

Here it is, the tripod gets bolted to the tank floor, the shafts ride on 1/2"bronze bushings. The motors are mounted in the circular cut outs to the side and rear.


Negative elevation! almost looks like it's autonomous...


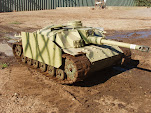
Mounted in the hull.


=Mr.TigerAce=

Mantle

Hi all,
Here is the gun mantle. 2mm steel sides, 3mm steel tube, 8mm steel back. It will get the same filler treatment as the superstructure as well as scale welds.
Rear showing the pivot points.
Test fit in the superstructure.
=Mr.TigerAce=

Saturday, October 23, 2010

Back To Building

Its been a while but I'm finally back working on the StuG!

Box of parts I picked up from the laser cutter! The majority of the parts are 2mm mild steel, the airvent cover plate and the splash guards on either side of the gun mantle are 5mm mild steel and the rear of the gun mantle itself is 8mm plate steel! heavy little sucker

For the welding I'm using a WIA 175 gasless mig (courtesy of SignStyle). I run it on a medium setting 80 or so amps with a .9 flux core wire. At 80amps you don't have time to dose off as you'll burn through, I find it easiest to make very fast small welds, 10-15mm long at a time.


The is the superstructure tacked together. You have to be very careful to tack everything perfectly square, if your out of square its a simple matter of breaking the tack and re aligning.

A spare piece of 1.6mm steel sheet comes in very handy as a work bench, you can earth the sheet and anything you place on it can be welded without the need to ground each part. It also allows you to use magnets to hold things in position, as well as allowing you to tack the parts to the bench to hold them in place. Time saver all round.
Here is the rear engine deck, the hatches sit on a small lip that runs the perimeter of each hole.
Hatches in place to check the fit (perfect)
The inside of the superstructure after final welding. There is no need to seem weld the entire part, a few small stitches is more then enough to hold it together. It also generates less heat so the parts don't warp.
Exterior shot. All the welds are done on inside so the outside is perfectly flat and smooth, no grinding required. A small amount of filler will be added to all the seems then sanded flush before painting.
Front view showing the 5mm plate on the mantle opening.
Another view
Sitting on the chassis making sure it fits
Which it does!
I also added these towing eyes, they are fully functional.
Next up will be the gun mantle. Followed (hopefully!) by the fenders.
Stay tuned!
=Mr.TigerAce=

Monday, October 18, 2010

Get your 2H!

Over the past few years my 2H has turned into a G5 and my drafting table has been turned into a 24" lcd, computers are forever getting better and the old pencil is still an old pencil... The best part is mm perfect parts with less skill required to create them!


Few things to get your head around. Try not to get computer F*^&#D, the ability to zoom to microscopic views tends to make each part over complex. The first few parts I made everything was way to precise and detailed, KISS. Your laser cutter will thank you for it.


The right tools.
MS Paint can create 2D drawings no problems at all, you'll be paying for the time it takes your cutter to redraw it! Make sure you work in a vector based program like, Corel Draw, Adobe illustrator, auto cad etc. Most laser cutters want a single vector path with as fewer nodes as possible, to make a nice clean cut.


It definitely takes time to learn each program, the decision of which to use, and how to use it is up to you. Vector is the key.

Here are some parts I have drawn for the StuG in CorelDraw x4.


A KV-1 I drew, begging to be sent to the laser cutter!


Stay tuned
=Mr.TigerAce=

The Hard Part

Hello!

After 4 long tank free months I am back again to let you know updates are coming!

On the list are, Superstructure, Fenders, Mantle, marker mounts including elevation and rotation systems!

Thank you everybody for the support so far! I have been amazed at the conversations started over this little blog on the interwebs! I have been getting a lot of questions and comments which I hope to address in future posts.

The first update will include detailed instruction in regard to designing, drawing, cutting and finally welding the tanks superstructure. I'm not sure if you have looked at a Stug 3G before but you will notice its a complex part so it has a taken a lot of work to get the drawings together (hence the delay!)

So please stay tuned you wont be disappointed!

Cheers,
=Mr.TigerAce=