
You must make sure to "tack" weld it all together first to check for square, then only do very small seem welds, as you don't want to introduce to much heat into the steel as it will warp. It's best to take your time and do it properly once.
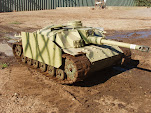
here is a pic of the assembled lower hull with road wheel swing arms, idler shaft and return roller shafts installed.

This is the suspension setup. I used eyebolts so I can adjust spring tension and ride height, the shafts ride on sintered bronze bushings. A simple "cotter" pin holds the shafts in place (temporarily fitted) as they see virtually no "pull" load at all. note, I have since added supports to the adjustment plates as they were flexing under load.

This bulkhead removes a lot of the "flex" from the hull, its also there to hold cooling fans, as well as provide support for the battery mount.

Here are the drive shaft bearings (acquired from, http://www.surpluscenter.com/), located in the front of the hull. Notice this area is reinforced with 5mm steel plate as it has to handle a decent amount of force. The drive shaft are 5/8" keyed steel, the swing arm, road wheel and return roller shafts are 1/2" bright steel and the idler shaft is 5/8"

All eyebolts, springs and bushings were purchased from www.mcmaster.com
Stay tuned, next up wheels and tracks!
=Mr.TigerAce=

No comments:
Post a Comment